Save to Pinterest
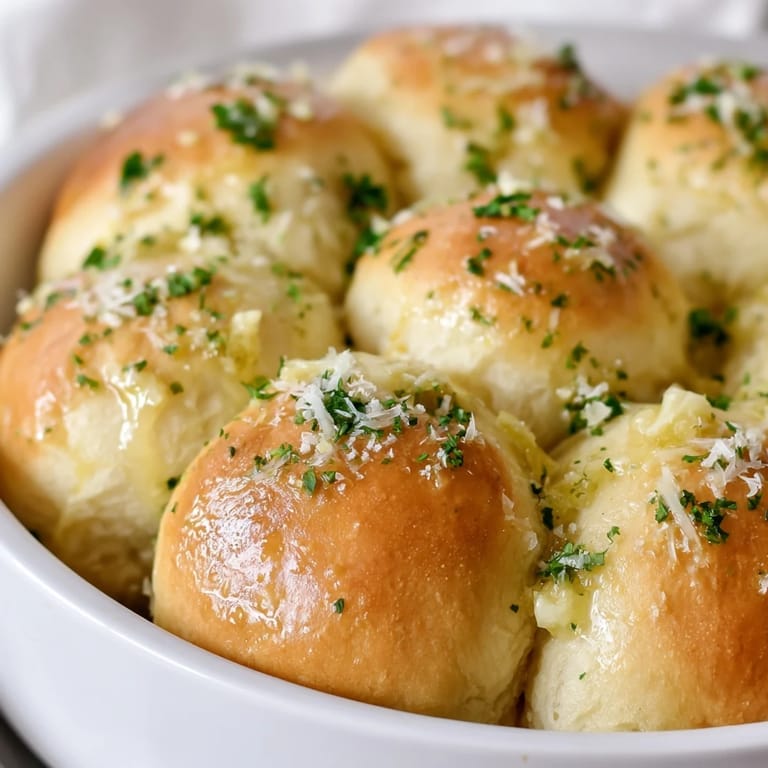
 The smell hit me before I even opened the oven door: butter, garlic, and something golden turning crisp at the edges. I was hosting a game night and needed something people could grab without forks or fuss. These pull-apart rolls came together faster than I expected, and by halftime, the pan was empty except for a few shiny butter spots. Someone asked if I'd ordered them from a bakery, which felt better than any compliment I'd gotten all week.
I made these on a rainy Sunday when my sister came over unannounced. We sat at the kitchen table, tearing off warm rolls and dipping them into olive oil while the rain drummed against the window. She said it reminded her of the garlic knots we used to get at the pizza place near our old apartment. I hadn't thought about that place in years, but suddenly I could picture the red booths and the way the paper bags always had grease spots on the bottom.
What's for Dinner Tonight? 🤔
Stop stressing. Get 10 fast recipes that actually work on busy nights.
Free. No spam. Just easy meals.
Ingredients
- All-purpose flour: The backbone of the dough, giving structure without being too heavy; I always spoon it into the measuring cup and level it off so I don't pack in too much.
- Instant yeast: No need to proof it first, just mix it straight into the dry ingredients and let it do its work quietly during the rise.
- Warm milk: It should feel like bathwater on your wrist, warm enough to wake up the yeast but not so hot it kills it.
- Unsalted butter (for dough): Melted and stirred in, it makes the dough tender and adds a richness you can taste in every bite.
- Garlic: Freshly minced is the only way to go here; the jarred stuff just doesn't have the same punch or fragrance.
- Fresh parsley: Chopped fine and stirred into the butter, it adds a bright green contrast and a hint of freshness that cuts through the richness.
- Parmesan cheese: Optional, but a sprinkle on top before baking gives the rolls a salty, nutty crust that crisps up beautifully.
Instructions
- Mix the dough:
- In a large bowl, whisk together the flour, yeast, sugar, and salt until evenly distributed. Pour in the warm milk and melted butter, then stir with a wooden spoon until a shaggy dough forms and no dry flour remains at the bottom.
- Knead until smooth:
- Turn the dough out onto a lightly floured counter and knead for 7 to 8 minutes, pressing and folding until it feels smooth, elastic, and just slightly tacky. If using a stand mixer, let the dough hook work for about 5 minutes on medium speed.
- Let it rise:
- Place the dough in a greased bowl, cover it with a clean kitchen towel, and set it somewhere warm and draft-free. After about an hour, it should have doubled in size and feel airy when you gently press it.
- Make the garlic butter:
- In a small bowl, stir together the melted butter, minced garlic, chopped parsley, salt, and pepper until everything is evenly mixed and fragrant. Keep it nearby so it stays soft and easy to work with.
- Shape the rolls:
- Punch down the risen dough, turn it out onto the counter, and divide it into 12 equal pieces using a dough scraper or knife. Roll each piece into a smooth ball by cupping your hand over it and moving it in small circles on the counter.
- Coat in garlic butter:
- Dip each dough ball into the garlic butter, turning it to coat all sides, then arrange them snugly in a greased 9-inch round pan. Drizzle any leftover butter over the top, making sure every crevice gets a little.
- Second rise:
- Cover the pan loosely with plastic wrap and let the rolls rise for 20 to 30 minutes until they look puffy and have expanded to touch each other. They should feel soft and springy when you poke them gently.
- Bake until golden:
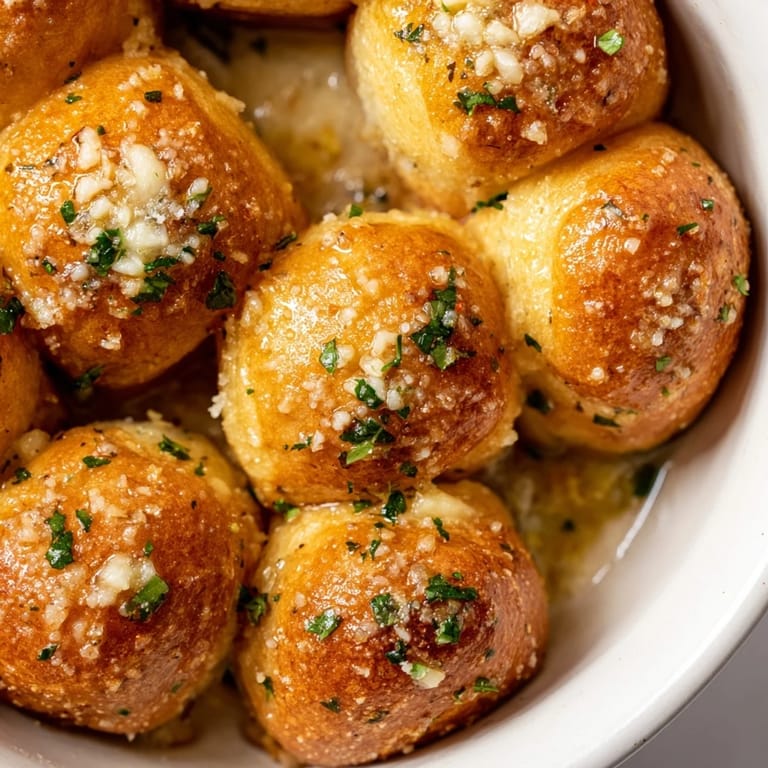
- Preheat your oven to 350°F, sprinkle Parmesan over the rolls if you like, and bake for 22 to 25 minutes. The tops should be deeply golden, and the kitchen should smell like a dream.
- Cool briefly and serve:
- Let the rolls cool in the pan for about 5 minutes so they set up just enough to handle. Serve them warm, straight from the pan, and watch people pull them apart with their fingers.
 Save to Pinterest
 The first time I served these at a potluck, someone asked for the recipe before they even finished chewing. I scribbled it on the back of a napkin, and a week later she texted me a photo of her own batch, golden and glistening in a cast iron skillet. It felt good knowing something I made in my kitchen had traveled into someone else's home and brought that same warm, garlicky comfort.
Storing and Reheating
Leftovers keep well in an airtight container at room temperature for up to two days, though they rarely last that long. If you want to refresh them, wrap the rolls in foil and warm them in a 300°F oven for about 10 minutes until they soften and the butter melts again. You can also freeze the baked rolls for up to a month; thaw them on the counter and reheat the same way, and they'll taste almost as good as the day you baked them.
Ways to Mix It Up
I've tucked cubes of mozzarella into the center of each dough ball before shaping, and when you pull them apart, you get these stretchy cheese strings that make everyone at the table stop and stare. A pinch of red pepper flakes in the garlic butter adds a subtle heat that sneaks up on you. Once, I brushed the tops with a little honey butter instead of Parmesan, and they turned sweet and savory in a way that paired perfectly with roasted chicken.
Serving Suggestions
These rolls are perfect alongside a big pot of tomato soup or a hearty pasta dish where you need something to soak up the sauce. I've also served them as an appetizer with marinara for dipping, and they disappeared faster than anything else on the table. They're just as good with a simple green salad or a bowl of chili, and honestly, sometimes I eat one for breakfast with my coffee, no judgment.
- Serve them warm from the oven while the butter is still glossy and fragrant.
- Set out a small bowl of marinara, pesto, or balsamic vinegar for dipping.
- Pair them with roasted vegetables, grilled meats, or a cozy bowl of soup.
 Save to Pinterest
 There's something about breaking bread together, literally, that turns a regular meal into something people remember. These rolls do that every single time.
Recipe Q&A
- → Can I prepare the dough ahead of time?
Yes, you can prepare the dough up to 24 hours in advance. After the first rise, punch it down and refrigerate in an airtight container. Let it come to room temperature before shaping and coating with garlic butter.
- → What's the best way to store leftovers?
Store cooled rolls in an airtight container at room temperature for up to 2 days, or refrigerate for up to 4 days. Reheat gently in a 300°F oven for 10 minutes or microwave individual rolls for 20-30 seconds.
- → Can I freeze these rolls?
Absolutely. Freeze unbaked rolls in the cake pan for up to 1 month, tightly wrapped. Thaw overnight in the refrigerator, then let them rise for 30-45 minutes before baking as directed.
- → How do I know when the dough has risen enough?
The dough should roughly double in size, typically taking 45 minutes to 1 hour in a warm environment. It should feel light and airy when you gently press it—your finger should leave a slight indentation.
- → What can I use instead of instant yeast?
Use active dry yeast in the same amount, though it may require an extra 10-15 minutes for rising. Alternatively, use 1/2 teaspoon rapid-rise yeast for slightly faster results.
- → Can I make these dairy-free?
Substitute butter with a dairy-free alternative and use unsweetened plant-based milk. Parmesan can be replaced with nutritional yeast for a similar umami flavor.