 Save to Pinterest
 My daughter came home from school talking nonstop about Cookie Run Kingdom, specifically obsessed with Pure Vanilla Cookie's elegant aesthetic. That weekend, watching her sketch cookie designs at the kitchen table while I scrolled through baking ideas, something clicked—why not make these dreams edible? The moment I piped that first glossy royal icing swirl onto a cooled sugar cookie and saw her face light up, I realized this recipe would become our tradition.
I'll never forget baking these for my nephew's birthday party, when four kids gathered around the cooling rack with piping bags in hand, absolutely focused on decorating their own cookies. The kitchen became this little art studio, frosting everywhere, laughter bouncing off the walls, and somehow every single creation looked intentional and beautiful. That's when I understood these weren't just cookies—they were a canvas for joy.
What's for Dinner Tonight? 🤔
Stop stressing. Get 10 fast recipes that actually work on busy nights.
Free. No spam. Just easy meals.
Ingredients
- All-purpose flour: The foundation that keeps your dough tender without spreading; I learned the hard way that sifting really does make a difference in texture.
- Baking powder: Just enough to give the cookies a slight lift and delicate crumb, nothing more or you'll lose that classic sugar cookie density.
- Unsalted butter: Room temperature is non-negotiable here; cold butter means lumpy dough and uneven baking, trust me on this one.
- Granulated sugar and egg: Together these create that signature tender crumb and help the icing adhere perfectly to the surface.
- Pure vanilla extract: Worth buying the real stuff because it adds warmth that imitation extract simply can't match.
- Powdered sugar and meringue powder: The meringue powder is what makes your icing set hard and glossy rather than staying sticky; it's the secret weapon.
- Gel food coloring: Use gel, not liquid, because liquid food coloring will throw off your icing consistency and muddy your colors.
Instructions
- Prepare your dry ingredients:
- Whisk flour, baking powder, and salt together in a medium bowl and set it nearby; this prevents lumps from forming later when you're mixing.
- Cream butter and sugar until fluffy:
- Beat for 2-3 minutes until the mixture looks pale and billowy—this incorporates air that makes cookies tender and light.
- Bring the wet ingredients together:
- Add egg, vanilla, and milk to your buttery mixture, stirring until everything disappears into a smooth, cohesive base.
- Marry wet and dry gently:
- Add the flour mixture slowly while mixing on low speed, stopping as soon as no white streaks remain; overmixing toughens the dough.
- Chill the dough:
- Flatten into two disks, wrap tightly, and refrigerate for at least an hour so the dough firms up and flavors deepen.
- Shape and bake:
- Roll between parchment sheets to avoid extra flour, cut shapes cleanly, and bake until edges just blush golden—they'll continue cooking slightly as they cool on the sheet.
- Make your royal icing:
- Combine powdered sugar, meringue powder, vanilla, and water, beating until smooth; add water one teaspoon at a time until you reach piping consistency.
- Decorate and set:
- Apply icing to completely cooled cookies using piping bags, then allow 4-6 hours for the icing to harden fully before stacking or storing.
 Save to Pinterest
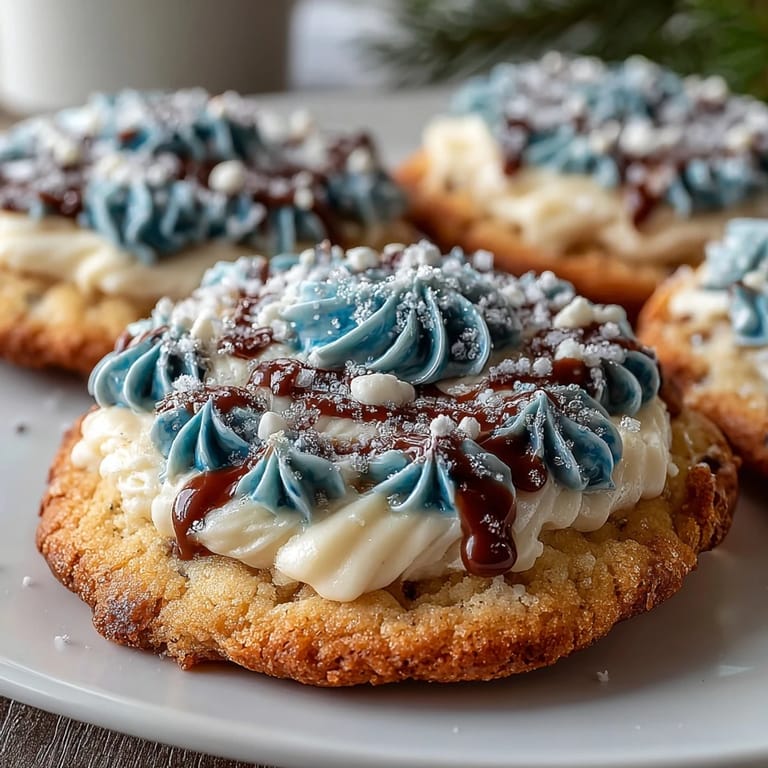
 There's something almost meditative about decorating these cookies, the quiet rhythm of squeezing the piping bag, watching colors bloom across white frosting. My son once spent an entire afternoon perfecting tiny gold swirls on each cookie, completely absorbed, and when he finally stepped back to admire his work, the pride on his face made every minute worth it. These cookies became proof that homemade things carry a different kind of value.
Why These Cookies Stay Picture-Perfect
Sugar cookies have been a staple of American baking for generations, but when you add royal icing, they transform into something almost sculptural. The firm surface holds detail beautifully, which is why bakers have used this technique for everything from holiday cookie decorating to wedding favors. What makes this version special is the balance—the cookie itself is delicate enough to bite through easily, while the icing is sturdy enough to withstand shipping or stacking without cracking.
Coloring Your Cookies for Theme Perfection
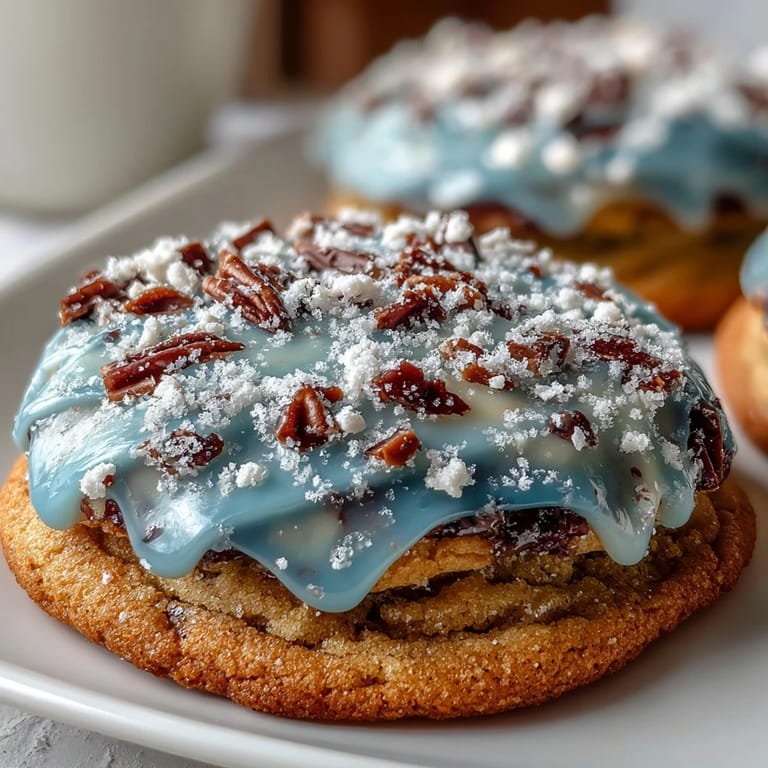
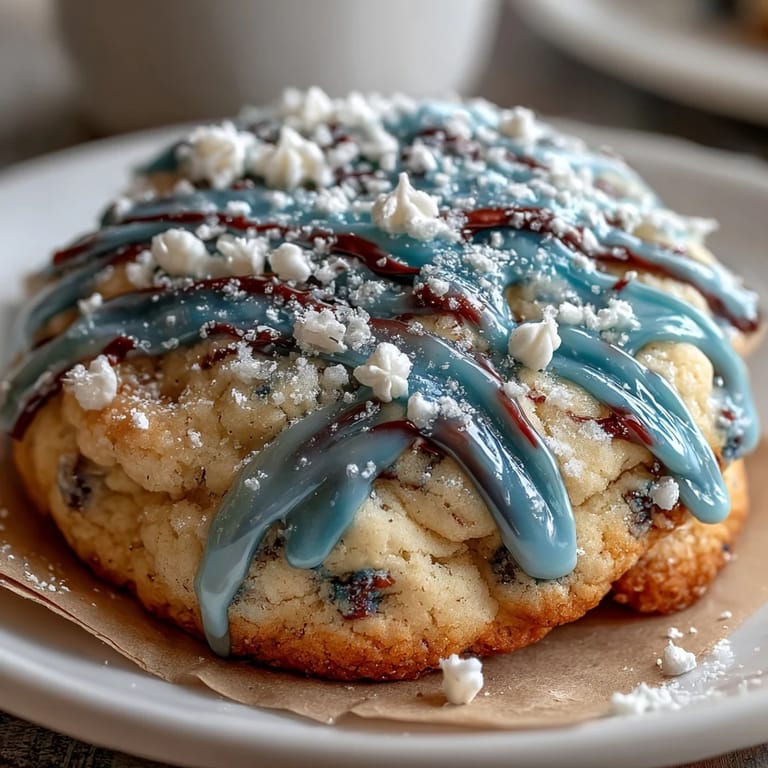
The Pure Vanilla Cookie from the game inspired us to mix soft blues, pale yellows, and ivory whites, creating this serene color palette that somehow feels both sophisticated and whimsical. I discovered that blending two gel colors sometimes creates better results than using them straight from the bottle; a tiny bit of blue mixed into white gives you this ethereal periwinkle that photographs beautifully. You can also theme these for any game character, holiday, or color story you're imagining—the dough and icing are your blank canvas.
Storage and Gifting Strategy
Because royal icing hardens, these cookies actually travel remarkably well, making them ideal for gifts or parties where you're not serving immediately. Stack them in layers with parchment paper between each layer, pack them in an airtight container, and they'll stay fresh for up to a week at room temperature. I've shipped these cookies across the country and they arrive looking nearly as perfect as the day I decorated them, which honestly still amazes me.
- Allow icing to fully cure for 24 hours before stacking for maximum durability and minimal smudging.
- Store in an airtight container with silica packets if your climate is particularly humid.
- These keep beautifully at room temperature but should never be refrigerated, as condensation will soften the icing.
 Save to Pinterest
 These cookies remind me that sometimes the most meaningful things we bake aren't about complexity or exotic ingredients, but about showing up and creating something beautiful with our hands. Whether you're making them for a Cookie Run Kingdom fan or simply want cookies that look as good as they taste, this recipe delivers on both counts.
Recipe Q&A
- → How do I achieve soft sugar cookies?
Chilling the dough for at least an hour helps control spreading and creates a tender texture once baked.
- → What makes royal icing glossy and smooth?
Combining powdered sugar with meringue powder and gradually adding water creates a smooth, shiny consistency ideal for decorating.
- → Can I add color to the icing?
Yes, gel food coloring can be added to the icing for vibrant, decorative finishing touches.
- → How long should decorated cookies dry before storing?
Allow icing to set completely, usually a few hours, ensuring a hard finish for stacking and storing safely.
- → What tools are needed for decorating?
Use piping bags or squeeze bottles to apply the royal icing precisely on fully cooled cookies.
- → How should cookies be stored to maintain freshness?
Store cookies in airtight containers at room temperature to keep them fresh for up to one week.