 Save to Pinterest
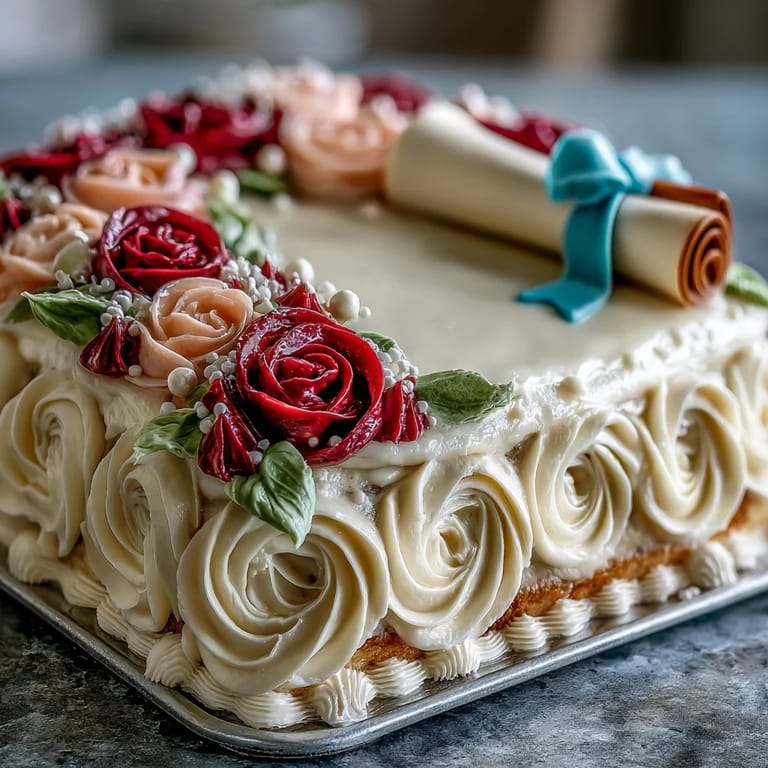
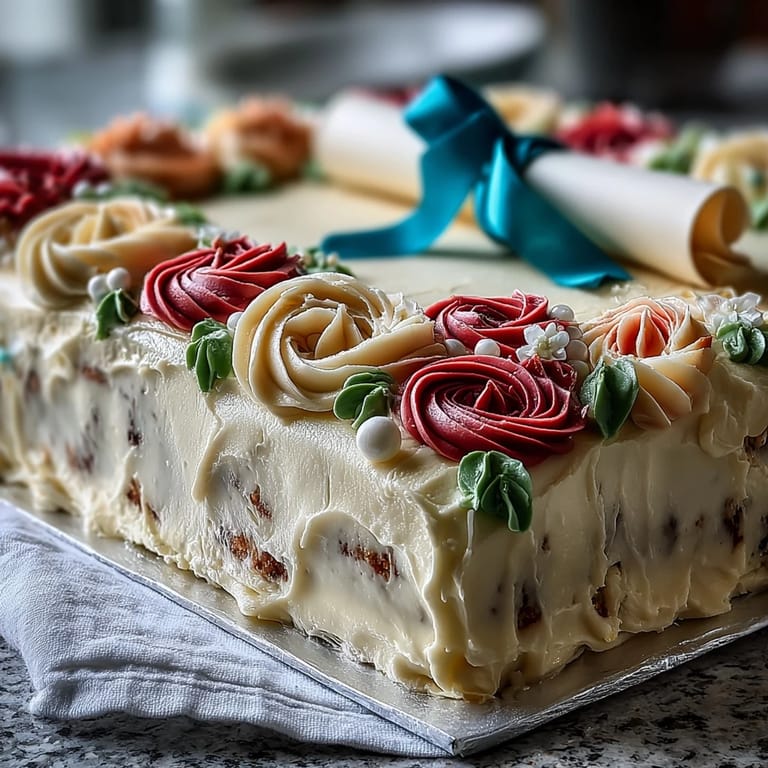
 The kitchen was buzzing that morning as I tried my hand at a graduation sheet cake, a project inspired by the promise of celebration. The sweet scent of butter and vanilla clung to my apron, mingling with nervous excitement as I imagined the finished cake—a canvas for bright buttercream roses and an edible diploma. I could almost hear the laughter from future guests as I swirled batter into the pan, hoping it would bake up perfectly even. With music playing low in the background and daylight spilling across the counter, there was an energy that made the process feel like more than just baking. Making this cake felt almost ceremonial itself—like I was marking the occasion right alongside the graduates.
One afternoon, my niece and I decorated her graduation cake together, laughing as we attempted our first buttercream roses—some bloomed beautifully, others resembled blobs, but every petal was layered with anticipation for her big day. We snuck tastes of the frosting and debated over which school colors to use, settling on a riotous explosion of deep violet and gold. The edible diploma took shape after several giggles and fumbles with fondant, proof that imperfect details have their own charm. Watching her shake off stress and really enjoy the creativity made the kitchen feel like a stage for a small family celebration even before the party began. That cake didn’t just mark her accomplishments—it became a memory we both cherish.
What's for Dinner Tonight? 🤔
Stop stressing. Get 10 fast recipes that actually work on busy nights.
Free. No spam. Just easy meals.
Ingredients
- All-purpose flour: Gives the cake structure and softness—measure carefully to avoid a dense result.
- Granulated sugar: Sweetens the cake and helps the texture turn fluffy; I like to use superfine sugar for a smoother crumb.
- Unsalted butter (for cake and frosting): Room temperature butter is easier to cream, and imparts richness to both cake and buttercream.
- Whole milk or heavy cream: Milk keeps the batter moist; heavy cream makes the frosting decadent and silky.
- Large eggs: Add lift and tenderness, especially when brought to room temperature.
- Vanilla extract: The aroma is what makes this cake taste like a true celebration—real, not artificial, is worth it here.
- Baking powder: Ensures a nice rise; double-check the date so it does its job.
- Salt: Just a dash balances sweetness and keeps flavors lively.
- Powdered sugar: Sift it well for the buttercream so piping comes out smooth and clog-free.
- Food coloring (gel): Gel colors create vibrant roses without watering down the buttercream.
- Edible pearls and fondant: Optional, but they add sparkle and allow personal touches like school colors or a creative diploma.
Instructions
- Prepare and pan the cake:
- Preheat the oven to 350°F (175°C) and line the sheet cake pan with parchment—getting the corners tight makes the later release so much easier.
- Mix butter and sugar:
- Beat them together for a full three minutes, until the mixture is pale and fluffy; your arm might ache, but that's where the magic starts.
- Add eggs and vanilla:
- Mix in eggs one at a time, then stir in vanilla—the batter will look glossy and smooth, promising a tender cake.
- Combine dry ingredients:
- Whisk flour, baking powder, and salt so they're evenly distributed; it's the secret to avoiding streaks in your crumb.
- Fold and alternate:
- Add flour mixture in three rounds, alternating with milk, starting and finishing with flour; mix gently for a light batter.
- Pour and bake:
- Spread batter into the pan and smooth the top—bake until a toothpick emerges clean and the center springs back.
- Cool and turn out:
- Allow the cake to sit in the pan for ten minutes before moving it to a wire rack; patient cooling prevents cracks.
- Buttercream magic:
- Beat butter to creamy, then mix in sifted powdered sugar, vanilla, and milk for a fluffy frosting—adjust the consistency for easy piping.
- Color and divide:
- Divide buttercream into bowls for tinting separate shades, using gel color so hues pop and don't run.
- Frost and decorate:
- Coat the cooled cake in white buttercream, then pipe roses with colored buttercream and leaves with green—practice a few roses on parchment if you're nervous.
- Make and place diploma:
- Shape fondant or white chocolate into a diploma scroll, add a ribbon of colored fondant, and anchor it on the cake.
- Finish with accents:
- Scatter edible pearls and any other decorative touches for sparkle and personality.
 Save to Pinterest
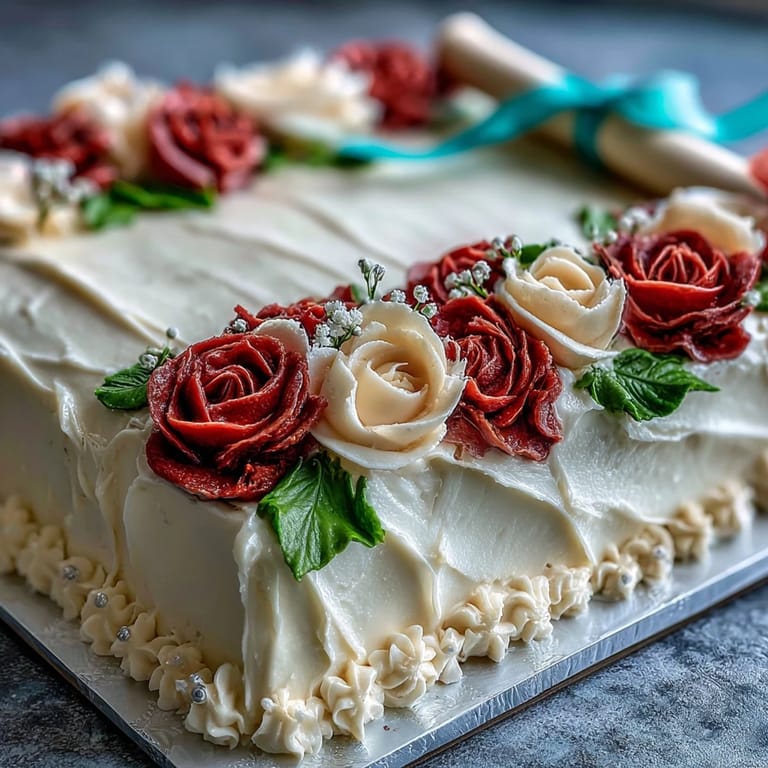
 When my cousin's graduation cake was revealed at the party, the room filled with applause for the edible diploma and blooms—even folks who claimed not to like cake asked for a piece. Sharing slices, we told stories and admired the details, realizing that dessert really can bring people together. That cake wasn't merely dessert; it became a centerpiece for connection and celebration.
Making Buttercream Roses Without Tears
Getting buttercream right for roses took me a few tries—too much milk meant droopy petals, while too little made piping nearly impossible. Coloring the frosting with gel made all the difference, keeping it stable and bright. I suggest practicing petals on parchment before working on the cake; it reduces anxiety and speeds up the decorating process. Even imperfect roses end up charming when they’re clustered. Let yourself enjoy the creativity, not just the precision.
Choosing School Colors for Extra Spirit
Adding school colors is a fun way to personalize the cake; I mix gel colors to get vivid shades, and experiment with different piping techniques for banners or borders. Sometimes I layer colors in the roses themselves for a marbled look. The edible diploma can be finished with gold dust or pearls to elevate the effect. Decoration becomes a group activity—inviting help always means more laughter and fewer worries.
The Best Sheet Cake Serving Strategies
Letting the cake cool before slicing makes for cleaner, sharper pieces and keeps the frosting from smearing. Cutting with a sharp, hot knife gives neat portions and adds a touch of showmanship for the big reveal. For large gatherings, slice in a grid so every guest gets a generous square topped with a rose or accent.
- Plan for extras, because this cake disappears fast.
- Keep napkins handy—the frosting is irresistible and messy.
- Label allergen info so everyone feels welcome at the table.
 Save to Pinterest
 Serve your graduation sheet cake with pride—there’s nothing like seeing the joy when a favorite treat marks the occasion. No matter how you decorate it, sharing this cake turns a milestone into something even sweeter.
Recipe Q&A
- → How do I achieve vibrant buttercream colors?
Use gel food coloring for bold shades without altering frosting consistency. Mix thoroughly for even color.
- → Can I personalize the cake with school colors?
Absolutely. Tint the buttercream and decorations using gel coloring to represent your graduate’s school colors.
- → What is the best way to pipe buttercream roses?
Use a rose piping tip and chilled buttercream. Practice on parchment before decorating the cake for uniform flowers.
- → How can the diploma decoration be made?
Shape fondant or white chocolate into a scroll, tie with colored fondant ribbon, and place atop the frosted cake.
- → How do I ensure the cake stays moist?
Let the cake cool completely before frosting and avoid overbaking. Store covered until serving for optimal freshness.
- → Can this dessert be made ahead?
Yes, bake and cool the cake, store well-sealed, and decorate just before serving to keep the colors and textures vibrant.