 Save to Pinterest
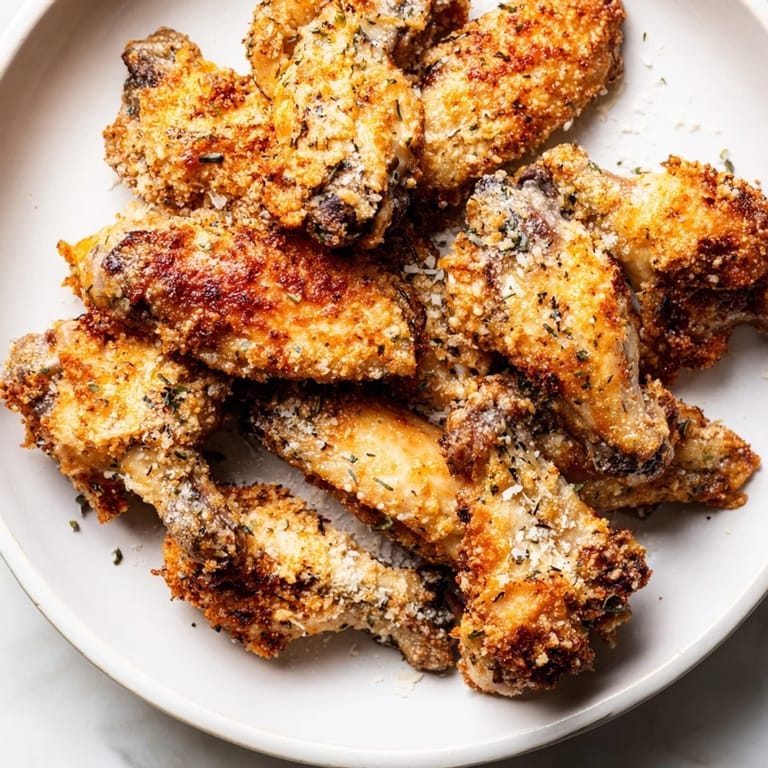
 My brother called on a Saturday afternoon asking if I could bring wings to his place for the game. I had maybe an hour, and while I could've ordered delivery, something made me want to try making them at home instead. I'd always been intimidated by the crispy-coating thing, but that day I grabbed what I had—Parmesan, breadcrumbs, eggs—and threw it together. When those golden wings came out of the oven forty minutes later, still crunching when I bit into one, my entire approach to cooking changed. It sounds dramatic for chicken wings, but it was.
I brought those wings to my brother's place, and they disappeared before halftime. His friend Mike—who's one of those people with really strong opinions about food—actually asked for the recipe. That felt like winning an award. Now whenever someone says they're doing a party, these are what I make, and they always come back to me asking how I got them so golden.
What's for Dinner Tonight? 🤔
Stop stressing. Get 10 fast recipes that actually work on busy nights.
Free. No spam. Just easy meals.
Ingredients
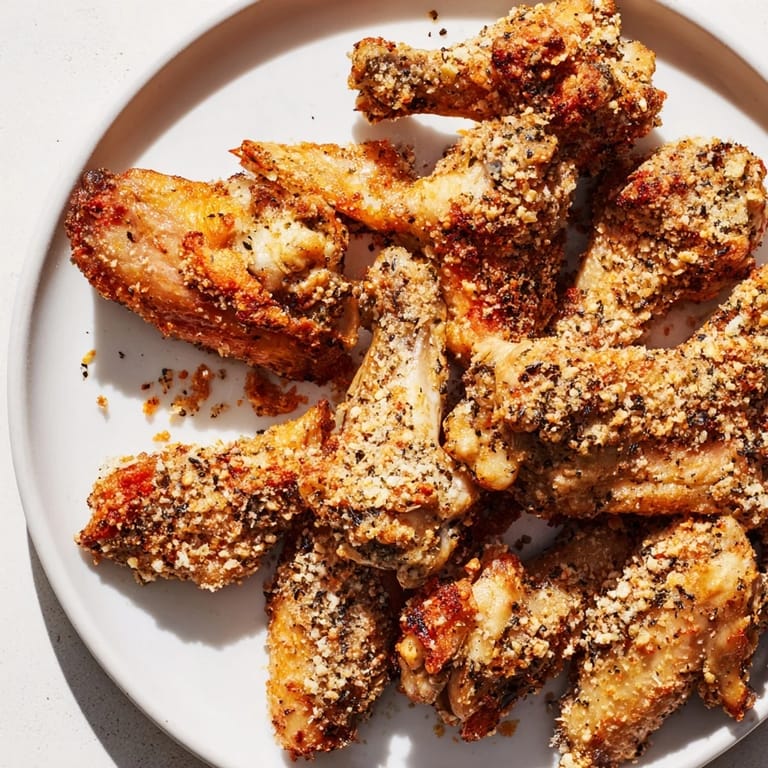
- Chicken wings (2.5 lbs), separated into flats and drumettes: The separation matters more than you'd think—flats and drumettes cook at slightly different rates, so splitting them keeps everything from drying out while you wait for the thicker pieces to catch up.
- Parmesan cheese (3/4 cup, grated): Use the good stuff if you can, not the pre-shredded kind with the cellulose coating—it won't melt and crisp the same way.
- Breadcrumbs (1 cup, fine): Fine breadcrumbs give you that delicate, almost lacy crust; panko will be too thick and chunky.
- Garlic powder, onion powder, dried Italian herbs (1 tsp each): These three are the backbone of the flavor—dried herbs work better here than fresh because they concentrate as things bake.
- Smoked paprika (1/2 tsp): Adds a whisper of smokiness that makes people wonder what your secret is.
- Black pepper and sea salt (1/2 tsp each): Taste as you go; salt levels depend on your Parmesan brand.
- Eggs and milk (2 eggs, 2 tbsp milk): The egg mixture is your glue—don't skip the milk, it thins the egg just enough to coat evenly without pooling.
- Olive oil (2 tbsp): A light brush at the end makes the difference between golden and pale.
Instructions
- Heat your oven first:
- Set it to 220°C (425°F) and line a large baking sheet with parchment paper. Brush the parchment lightly with olive oil so nothing sticks—this matters more than you'd think for easy cleanup and even browning.
- Prepare your coating station:
- Get two shallow bowls ready. Whisk eggs with milk in one until it's uniform, then combine all your dry ingredients in the other—Parmesan, breadcrumbs, garlic powder, onion powder, Italian herbs, paprika, pepper, salt.
- Dry your wings thoroughly:
- Pat them completely dry with paper towels; moisture is the enemy of crispiness. Take your time here—I learned this the hard way when my first batch came out slightly damp.
- Coat each wing:
- Dip into the egg mixture, then immediately into the breadcrumb mixture, pressing gently so the coating adheres. Work in batches of four or five so you're not fumbling around.
- Arrange on the sheet:
- Lay wings in a single layer without crowding—they need space to breathe and crisp up evenly. If they're touching, steam them instead of baking them.
- Brush with olive oil:
- Drizzle or brush each wing lightly with olive oil, which helps them brown and crisp. This is the step that turns them golden instead of pale.
- Bake and flip:
- Bake for 35–40 minutes, turning once at the halfway point with tongs. You're looking for a deep golden color and an internal temperature of 75°C (165°F).
- Optional broil for extra crispiness:
- If you want them extra crunchy, flip on the broiler for 2–3 minutes at the end—watch them closely, they go from perfect to burnt faster than you'd expect.
 Save to Pinterest
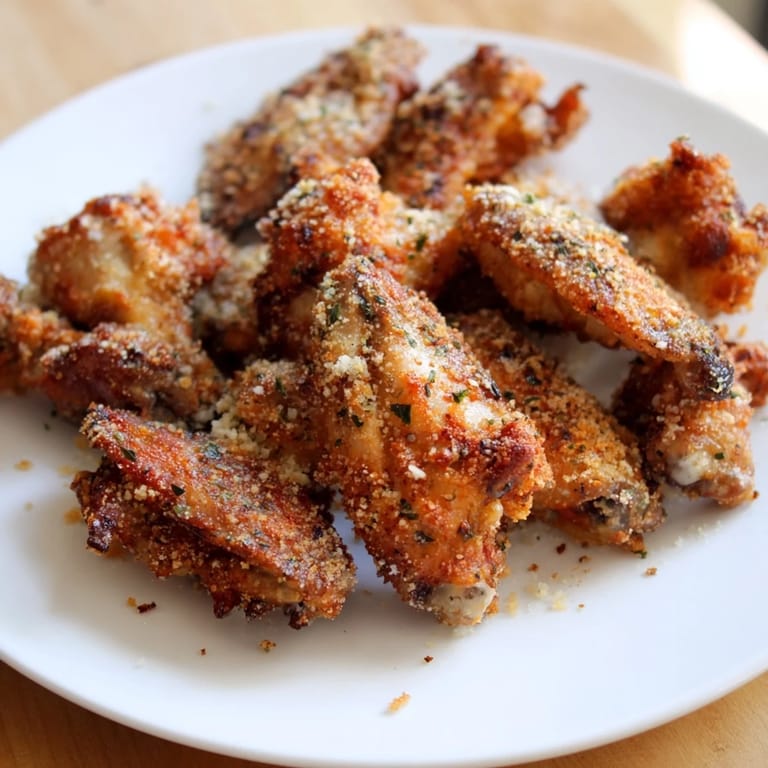
 The real moment for me was my mom trying one and immediately asking if they were store-bought. Not because she thought I'd cheated, but because she was genuinely surprised I'd made something that crispy and golden at home. I ate three of them while standing in the kitchen before anyone else even sat down, and I didn't even feel bad about it.
Getting the Coating Right
The coating is everything here, and it took me a couple attempts to figure out the balance. Too much egg mixture makes things soggy; too little and the breadcrumbs won't stick. The trick is a thin, even coating of egg—almost a light dip—followed by a generous press into the breadcrumb mixture. I learned to work quickly, coating four or five wings at a time before moving to the pan, which kept everything consistent. Room-temperature ingredients coat smoother than cold ones pulled straight from the fridge, which sounds like a small thing but actually matters.
Why This Bakes Instead of Fries
Baking these instead of deep frying changed how often I actually make them. No heating oil to dangerous temperatures, no grease splatter on my arms, no kitchen smelling like a restaurant fryer for three days. The oven method is honestly easier and cleaner, and the results are almost identical if you nail the coating and don't skip the olive oil brush. I'll never go back to deep frying wings at home.
Serving and Storage
Hot wings are always better than cold ones, so time them to come out of the oven right when people are ready to eat. They're best served immediately with cold celery sticks and blue cheese dip on the side—the contrast of temperatures and flavors is intentional. They'll keep in an airtight container in the fridge for three days, and you can reheat them in a 180°C oven for about eight minutes to bring back some crispiness.
- Serve immediately while they're still warm and crunchy for the best experience.
- Make the coating mixture ahead of time and store it in an airtight container for up to a week.
- Wings can be prepped and coated the morning of, then baked right before serving.
 Save to Pinterest
 These wings have become my go-to move for any gathering, and honestly, they've made me look like a better cook than I probably am. The best part is how simple they actually are once you understand the coating process.
Recipe Q&A
- → How do I achieve crispy chicken wings without frying?
Coating wings with a mixture of Parmesan, breadcrumbs, and spices, then baking at high heat creates a crisp crust without frying.
- → Can I make these wings gluten-free?
Yes, simply use gluten-free breadcrumbs to keep the coating safe for gluten-sensitive diets.
- → What herbs work well in the coating?
Dried Italian herbs or oregano provide classic flavor, but you can swap with your favorite spice blend for variety.
- → Is there a way to make the wings extra crispy?
After baking, broil the wings for 2–3 minutes for additional crispiness and color.
- → How should I serve these baked wings?
Serve hot with optional dips like ranch or marinara, and consider offering celery sticks and blue cheese for a classic touch.